Manuals

ozeri scale manual

Ozeri Scale Manual⁚ A Comprehensive Guide

Welcome to the comprehensive guide for your Ozeri scale! This manual provides essential information for maximizing your scale’s functionality․ Learn about features‚ troubleshooting‚ and maintenance to ensure accurate measurements and prolong the life of your device․

Ozeri scales are designed with precision and user-friendliness in mind․ These scales‚ available in kitchen and bathroom models‚ integrate advanced sensor technology․ The Ozeri brand is known for its sleek designs and accurate measurements‚ catering to health-conscious individuals and culinary enthusiasts alike․ Ozeri scales incorporate features such as tare functionality‚ unit conversion‚ and weight change detection․ Many models include an easy-to-read LCD screen․ This ensures usability for various applications․ Before using your new Ozeri scale‚ it is recommended to read through the user manual to fully understand its capabilities and ensure safe operation․ With proper care‚ your Ozeri scale can provide reliable results for years to come․

Understanding Ozeri Scale Models

Ozeri offers a variety of scale models‚ including kitchen scales (ZK series) and bathroom scales (ZB series)․ Each series provides unique features tailored to specific needs‚ ensuring accurate and reliable measurements for various purposes․

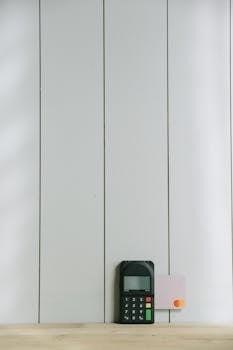
Ozeri Kitchen Scales (ZK Series)

Ozeri’s ZK series kitchen scales are designed for precise food measurements‚ crucial for cooking‚ baking‚ and portion control․ These scales often feature a digital display for easy reading and multiple unit conversions (grams‚ ounces‚ pounds‚ milliliters)․ The tare function allows you to zero out the weight of containers‚ ensuring accurate ingredient measurements․ Some models‚ like the ZK14-S Pronto‚ offer a sleek design and multifunctionality․
Many ZK series scales boast high precision‚ measuring in increments as small as 0․04 oz (1 gram)․ They are ideal for both everyday cooking and more specialized dietary or health-focused applications․

Ozeri Bathroom Scales (ZB Series)

Ozeri’s ZB series bathroom scales are designed to accurately measure body weight‚ often incorporating advanced features for a comprehensive health overview․ These scales typically display weight in pounds or kilograms on an LCD screen‚ some offering body composition analysis․ Models such as the ZB13 and ZB18 are known for their precision and user-friendly design․

Many ZB series scales feature “Step-On” technology‚ automatically powering on upon contact․ Some models calculate body fat‚ hydration levels‚ muscle mass‚ and bone measurements․ The ZB series combines style and functionality to assist users in tracking their fitness progress effectively․

Initial Setup and Operation

Get your Ozeri scale ready for use! This section covers battery installation‚ proper placement for accurate readings‚ and basic operation‚ including turning the scale on and off․ Follow these steps for optimal performance․

Battery Installation and Replacement

To begin using your Ozeri scale‚ proper battery installation is crucial․ Locate the battery compartment‚ typically on the scale’s underside․ Open the compartment and insert the correct type of batteries (usually AAA) according to the polarity markings (+ and -)․ Ensure they are securely placed․ When the scale displays a low battery indicator or fails to power on‚ it’s time for replacement․ Remove the old batteries and dispose of them responsibly․ Install new batteries following the same polarity guidelines․ Proper battery care ensures accurate and consistent performance from your Ozeri scale‚ maximizing its lifespan and reliability for all your weighing needs․

Placement and Calibration

Optimal placement of your Ozeri scale is vital for accurate readings․ Always place the scale on a hard‚ flat‚ and stable surface․ Avoid carpets‚ uneven floors‚ or surfaces that may cause instability․ Before the first use or after moving the scale‚ calibration might be necessary․ Some Ozeri scales auto-calibrate after battery changes or movement․ If manual calibration is needed‚ consult your specific model’s instructions․ Typically‚ this involves turning on the scale and allowing it to reach zero before weighing anything․ Proper placement and calibration ensure your Ozeri scale delivers consistent and reliable results‚ providing accurate measurements for your various needs‚ whether in the kitchen or bathroom․

Turning the Scale On/Off

Operating your Ozeri scale is straightforward․ To turn the scale on‚ locate the power button‚ often marked as “ON/OFF/TARE․” Press this button firmly․ The display should illuminate‚ indicating the scale is ready for use․ Some Ozeri models feature “Step-On” technology‚ automatically powering on when you step onto the platform․ To turn the scale off‚ simply remove any weight from the platform‚ and the scale will automatically shut down after a period of inactivity‚ conserving battery life․ For models without auto-shutoff‚ press the power button again to manually turn it off․ Always ensure the scale is completely off to maximize battery life and prevent accidental readings․ A simple on/off operation ensures ease of use with your Ozeri scale․

Key Features and Functions

Ozeri scales offer various key features‚ including unit conversion‚ tare functionality‚ and weight change detection․ These functions enhance usability and provide accurate measurements for diverse needs‚ from cooking to monitoring health metrics․

Unit Conversion (g/oz/lb/ml)

Ozeri scales simplify measurements with versatile unit conversion capabilities․ Easily switch between grams (g)‚ ounces (oz)‚ pounds (lb)‚ and milliliters (ml) to suit your specific needs․ This feature is particularly useful when following recipes with different measurement standards or accurately measuring liquids․ The intuitive design allows for quick and effortless toggling between units‚ ensuring precision in every measurement; Whether you are baking‚ cooking‚ or managing portion sizes‚ the unit conversion feature eliminates the need for manual calculations‚ saving you time and effort․ This functionality is a staple in Ozeri kitchen scales‚ making them a valuable tool for any kitchen․

Tare Functionality

The Tare function on your Ozeri scale allows you to measure ingredients accurately by subtracting the weight of containers․ Place your bowl or container on the scale‚ press the Tare button‚ and the display will reset to zero․ You can then add ingredients directly into the container‚ and the scale will only display the weight of the added contents․ This feature is essential for baking‚ cooking‚ and portion control‚ eliminating the need for separate calculations․ Tare functionality ensures precise measurements‚ contributing to consistent and successful culinary outcomes․ It simplifies the weighing process and is available on most Ozeri kitchen scale models․

Weight Change Detection Technology

Ozeri’s Weight Change Detection Technology‚ featured in some bathroom scales‚ offers insights into subtle weight fluctuations․ This technology highlights small gains or losses since your last weigh-in‚ assisting in tracking progress towards fitness goals․ Instead of just showing the current weight‚ the scale indicates the difference‚ making it easier to monitor trends․ This feature is especially useful for users managing weight through diet and exercise․ By emphasizing change‚ it provides a more dynamic view of progress․ Remember to weigh yourself under similar conditions each time for accurate tracking using this advanced feature on your Ozeri scale․

Troubleshooting Common Issues

Encountering problems with your Ozeri scale? This section addresses common issues such as inaccurate readings‚ scale malfunctions‚ and error messages․ Find solutions to ensure your scale operates correctly and provides reliable measurements․

Scale Not Turning On

If your Ozeri scale fails to power on‚ begin by checking the batteries․ Ensure they are correctly installed with the proper polarity․ Replace the batteries with a fresh set to rule out a power issue․ Verify the battery contacts are clean and free from corrosion; gently clean them with a dry cloth if needed․

If the scale still doesn’t turn on after replacing the batteries‚ try pressing the power button firmly and holding it for a few seconds․ In some cases‚ a loose connection or a depleted battery indicator might prevent the scale from powering up‚ so these steps are crucial for initial troubleshooting; If problems persist‚ contact customer support․

Inaccurate Readings

Experiencing inconsistent or incorrect weight measurements with your Ozeri scale? First‚ ensure the scale is placed on a hard‚ level surface‚ as uneven flooring can significantly impact accuracy․ Avoid carpets or rugs․ Verify that nothing is touching or leaning against the scale during use․

Recalibrate the scale by removing and reinserting the batteries‚ or consult your manual for specific calibration instructions․ Make sure your feet are dry and positioned consistently each time you weigh yourself․ If using a kitchen scale‚ ensure the weighing platform is clean and free of debris․ If issues persist‚ consider contacting Ozeri customer support for assistance․

Error Messages

Encountering error messages on your Ozeri scale can be frustrating․ Common error codes‚ such as “Err” or “O-Ld‚” typically indicate an overload (weight exceeding the scale’s capacity) or a sensor malfunction․ Review the scale’s maximum weight limit․

“Lo” may signify low battery‚ prompting replacement․ If you see an unusual or persistent error‚ try recalibrating the scale․ If the problem continues‚ consult your Ozeri scale’s manual for a comprehensive list of error codes and troubleshooting steps․ If the error persists even after troubleshooting‚ contacting Ozeri customer service for specialized support is advisable․

Care and Maintenance

Proper care and maintenance are crucial for the longevity of your Ozeri scale․ Regular cleaning and appropriate storage will ensure accurate readings and prevent damage․ Follow our guidelines to keep your scale in optimal condition․

Cleaning Instructions

To maintain the cleanliness and accuracy of your Ozeri scale‚ regular cleaning is essential․ Always ensure the scale is turned off before cleaning․ Use a soft‚ slightly damp cloth to wipe down the surface of the scale․ Avoid using abrasive cleaners‚ chemicals‚ or excessive water‚ as these can damage the electronic components and the surface finish․

For stubborn stains or spills‚ use a mild dish soap diluted in water․ Apply the solution to the cloth‚ not directly to the scale․ Gently wipe the affected area and then dry thoroughly with a clean‚ dry cloth․ Never immerse the scale in water or any other liquid․ Pay special attention to cleaning around the edges and any crevices where dirt may accumulate․ Regular cleaning will help ensure accurate readings and prolong the lifespan of your Ozeri scale․

Storage Recommendations

Proper storage is crucial for maintaining the performance and longevity of your Ozeri scale․ When not in use‚ store the scale in a cool‚ dry place‚ away from direct sunlight and extreme temperatures․ Avoid storing the scale in areas with high humidity‚ as moisture can damage the internal components․

It’s best to store the scale on a flat‚ stable surface to prevent any accidental damage․ If you have the original packaging‚ storing the scale in its box can provide extra protection․ Before storing‚ ensure the scale is clean and dry․ Remove the batteries if you plan to store the scale for an extended period‚ as batteries can corrode and cause damage․ Keep the scale away from heavy objects that could potentially damage it․ Following these storage recommendations will help keep your Ozeri scale in optimal condition․

Warranty Information and Customer Support

Your Ozeri scale comes with a warranty to protect against defects․ For assistance‚ contact Ozeri customer service via phone or email․ Remember that the warranty might not cover misuse or damage․

Warranty Period and Coverage

Your Ozeri scale is warranted to the original purchaser for a specific period‚ typically one to two years‚ from the date of purchase․ This warranty covers defects in materials and workmanship under normal use․ Ozeri will repair or replace any parts found to be defective due to a manufacturer’s defect during the warranty period‚ provided the scale is used as intended and in accordance with the user manual instructions․ The warranty does not cover damage caused by misuse‚ accidents‚ or unauthorized repairs․ To claim warranty service‚ you must return the defective unit‚ freight prepaid‚ along with proof of purchase and a detailed explanation of the issue․ Make sure to carefully pack the scale to prevent damage during transit․

Contacting Ozeri Customer Service

If you encounter any issues with your Ozeri scale or have questions about its operation‚ Ozeri’s customer service is available to assist you․ You can reach Ozeri customer service through multiple channels‚ including phone and email․ The phone number for Ozeri customer service is typically 1-877-299-1296․ Alternatively‚ you can send an email to support@ozeri․com with a detailed description of your issue․ When contacting customer service‚ please have your scale’s model number and purchase date readily available․ Be prepared to provide a clear explanation of the problem you are experiencing․ Ozeri’s customer service representatives can provide troubleshooting assistance‚ warranty information‚ and guidance on resolving any issues with your scale․ They can also provide information about replacement parts or repairs if needed․ Remember to consult the user manual before contacting customer service․

fd150 credit card terminal manual pdf

First Data FD150 Credit Card Terminal Manual PDF⁚ An Overview

The First Data FD150 is a popular payment terminal, and understanding its operation is key. This section offers an overview of the FD150 manual PDF. This PDF provides detailed instructions for setup, use, troubleshooting, and safety. It’s an essential resource for merchants.

What is the First Data FD150?

The First Data FD150 is a versatile and reliable point-of-sale (POS) terminal designed to facilitate seamless credit card and NFC payments for businesses. It serves as an affordable terminal solution, combining performance, ease of use, and a feature-rich design into a compact device. The FD150 is engineered to accept a wide range of payment methods, including traditional credit and debit cards (via magnetic stripe or EMV chip), as well as contactless payments such as Apple Pay and other NFC-enabled options.

This terminal is suitable for various business environments, offering support for dial-up, IP, and Wi-Fi connectivity, ensuring adaptability to different network infrastructures. It comes equipped with features to process transactions swiftly and securely, making it a valuable asset for merchants looking to streamline their payment processes. The FD150 is user-friendly, offering an intuitive interface that simplifies navigation and transaction management. It’s a replacement for the FD130, and it provides an efficient and effective payment processing solution.

FD150 Features and Benefits

The FD150 boasts a range of features and benefits designed to enhance payment processing for merchants. Its ability to accept various payment methods, including EMV chip cards, NFC contactless payments, and traditional magnetic stripe cards, ensures versatility and caters to diverse customer preferences. This terminal supports multiple connectivity options such as dial-up, IP, and Wi-Fi, providing flexibility in different business environments. The FD150’s compact design saves counter space, making it suitable for businesses with limited room.

Security is a priority, with the FD150 incorporating advanced encryption and security protocols to protect sensitive cardholder data and minimize the risk of fraud. Its user-friendly interface and intuitive navigation streamline transaction processing, reducing errors and improving efficiency. The FD150 is also known for its reliability, ensuring smooth and consistent performance during peak business hours. Its quick processing speeds and efficient transaction management help reduce wait times for customers, enhancing overall satisfaction. The affordability of the FD150 makes it an accessible option for small and medium-sized businesses looking to upgrade their payment processing capabilities.

FD150⁚ What’s in the Box?

When you receive your new FD150 terminal, it’s important to ensure all components are present before beginning the setup process. Typically, the box includes the FD150 terminal itself, which is the primary device for processing transactions. You should also find a power adapter, essential for powering the terminal and ensuring it’s ready for use. A roll of thermal paper is included, necessary for printing receipts for customers after each transaction. The box may also contain a telephone line cable, depending on your chosen connectivity option. This cable is used to connect the terminal to a phone line for dial-up processing.

A quick start guide or setup manual is usually included, providing basic instructions on how to connect and configure the terminal. Be sure to check for any additional accessories, such as a stylus for touchscreen models or a cleaning cloth for maintaining the device. If you are missing any of these items, it’s crucial to contact your supplier immediately to ensure you have everything needed to get your FD150 terminal up and running smoothly. Having all the components readily available will make the installation process easier and faster.

FD150 Setup and Installation

Setting up your FD150 terminal involves connecting it to power and a network. Ensure proper connections for smooth transactions. The setup manual provides detailed instructions for both ethernet and telephone line options, crucial for communication with the processor.

Connecting the FD150 to Power and Network

To begin using your First Data FD150 terminal, establishing proper power and network connections is paramount. First, locate the power input on the right side of the terminal, typically found behind a gate on the device. Connect the plug from the power adapter into this input. Next, plug the power adapter into a 120-volt electrical outlet or a surge suppressor, which is highly recommended to protect against power fluctuations.

For network connectivity, the FD150 supports both Ethernet and telephone line connections. Connecting via Ethernet generally provides a faster and more reliable connection. To do this, plug an Ethernet cable into the designated port on the terminal and connect the other end to your router or network switch. Alternatively, you can use a telephone line by connecting a standard phone cable from the terminal to a phone jack.

Before proceeding with any transactions, ensure that the terminal has successfully established a connection to the network. This is essential for processing payments and communicating with the payment processor. The FD150 requires this connection to function correctly. Once both power and network connections are secure, the terminal should power on, and you can proceed with the initial setup and configuration as outlined in the user manual.

FD150⁚ User Guide and Operation

This section details the user guide and operation of the FD150 terminal. It covers navigating the terminal’s interface and processing various types of transactions. Understanding these aspects ensures smooth and efficient payment processing. Refer to the manual for detailed instructions.

Navigating the FD150 Terminal

The FD150 terminal features a user-friendly interface designed for efficient navigation. Familiarizing yourself with the layout is crucial for smooth operation. The terminal typically includes a keypad for manual entry, a display screen for information, and function keys for various actions.

The main menu usually provides access to options such as sales, refunds, voids, reports, and configuration settings. Use the arrow keys to scroll through the menu items and the enter key to select an option. The clear key can be used to correct errors or return to the previous screen.

Understanding the icons and symbols displayed on the screen is also important. These icons often represent different functions or statuses, such as network connectivity, battery level, and transaction type. The terminal may also provide prompts and messages to guide you through various processes.

Refer to the FD150 manual PDF for a complete overview of the terminal’s navigation system. The manual provides detailed explanations of each menu option, function key, and icon. By mastering the navigation system, you can efficiently manage transactions and access the terminal’s features.

Furthermore, explore the settings menu to customize the terminal’s behavior to suit your specific needs. This may include adjusting display settings, configuring network connections, and setting security parameters. Proper navigation ensures optimal performance and security.

Processing Transactions on the FD150

The FD150 simplifies transaction processing, supporting various payment methods. To initiate a sale, select the “Sale” option from the main menu. The terminal will prompt you to enter the transaction amount. Use the keypad to enter the amount and press the enter key.

Next, the terminal will request the customer’s payment information. This can be done by swiping the card through the magnetic stripe reader, inserting the chip card into the EMV reader, or tapping the card for contactless payments (NFC). Follow the on-screen prompts to complete the payment process.

For manual card entry, select the “Manual Entry” option and enter the card number, expiration date, and CVV code. Ensure accurate entry to avoid errors. The terminal may also require you to enter the customer’s billing address for certain transactions.

After the payment information is entered, the terminal will connect to the payment processor to authorize the transaction. If the transaction is approved, the terminal will print a receipt for the customer and a merchant copy. The customer may be prompted to sign the receipt on the screen.

The FD150 also supports refunds and voids. To process a refund, select the “Refund” option and follow the prompts. To void a transaction, select the “Void” option and enter the transaction details. Refer to the FD150 manual PDF for detailed instructions and troubleshooting tips.

FD150 Troubleshooting

Encountering issues with your FD150? Don’t worry; many problems can be resolved quickly. First, check the power connection. Is the terminal plugged in securely and receiving power? If not, try a different outlet or power adapter. Next, verify the network connection. Ensure the Ethernet cable is connected properly or the Wi-Fi is configured correctly.

If the terminal displays an error message, consult the FD150 manual PDF for a list of common errors and their solutions. Common issues include “Communication Error,” “Invalid Card,” or “Transaction Declined.” For communication errors, check your internet connection or contact your service provider.

If the card reader is not working, try cleaning the magnetic stripe reader or EMV chip reader with a card reader cleaning card. Ensure that the card is swiped or inserted correctly. For declined transactions, verify the cardholder’s information and available credit.

If the printer is not working, check the paper roll and ensure that it is properly loaded. Clean the printer head with a printer cleaning card. If the issue persists, contact technical support.

For frozen screens or unresponsive terminals, try restarting the device. If the problem continues, consult the FD150 manual PDF for advanced troubleshooting steps or contact First Data support for assistance.

FD150 Quick Reference Guide PDF

The FD150 Quick Reference Guide PDF is an invaluable tool for merchants seeking immediate assistance with common terminal functions. This guide provides concise, step-by-step instructions for processing sales, refunds, and other frequent transactions. It is designed to be a readily accessible resource, eliminating the need to sift through the comprehensive user manual for basic operations.

The quick reference guide typically includes instructions for performing sale transactions via swiped cards, EMV chip cards, and manually keyed entries. It also covers refund processing, voiding transactions, and settling the batch. Clear, visual aids, such as diagrams and screenshots, often accompany the written instructions to further enhance understanding.

Merchants can use the FD150 Quick Reference Guide PDF to train employees quickly and efficiently, ensuring consistent transaction processing procedures. It also serves as a handy reminder for experienced users who may occasionally need a refresher on specific functions. The guide is designed to be printed and kept near the terminal for easy access.

The FD150 Quick Reference Guide PDF is a perfect supplement to the full user manual, providing essential information at a glance. It helps streamline operations, reduce errors, and improve customer service.

Where to Find the FD150 Manual PDF

Locating the FD150 Manual PDF is a straightforward process, with several avenues available to users. The primary source is often the official First Data website, where a dedicated support or resource section typically hosts downloadable manuals for their various terminal models, including the FD150. Searching the website using keywords like “FD150 manual” or “FD150 user guide” should lead you to the correct page.

Alternatively, your payment processor or merchant services provider may also offer the FD150 Manual PDF on their website or through their customer support channels. Many providers compile resources for the terminals they support, making it easy for their clients to access the information they need. Contacting their support team directly can also be a quick way to obtain the manual.

Another option is to perform a web search using search engines like Google, Bing, or DuckDuckGo. Using specific search terms such as “FD150 manual PDF download” will likely yield results from various websites, including official sources, third-party documentation sites, and online forums where users may have shared the manual.

Finally, checking the documentation that came with your FD150 terminal upon purchase is advisable. While a physical manual may not always be included, there might be a CD-ROM or a card with a link to download the PDF version.

Safety Information for FD150 Use

Ensuring safe operation of your FD150 terminal is paramount for both user well-being and device longevity. Always position the terminal on a stable, flat surface to prevent accidental falls or damage. Keep the device away from liquids and moisture to avoid electrical hazards and internal component corrosion. Never attempt to disassemble or repair the FD150 yourself; doing so can void the warranty and pose a risk of electric shock.

When cleaning the terminal, use a soft, dry cloth. Avoid using harsh chemicals, solvents, or abrasive cleaners, as these can damage the device’s surface and internal components; Regularly inspect the power cord and adapter for any signs of damage, such as fraying or exposed wires. If damage is detected, discontinue use immediately and replace the power cord.

Ensure the FD150 is connected to a properly grounded power outlet to prevent electrical surges from damaging the device. During thunderstorms or periods of prolonged disuse, it’s recommended to unplug the terminal from the power outlet to protect it from power surges. Keep the terminal out of direct sunlight and extreme temperatures, as these can affect its performance and lifespan.

Finally, always follow the manufacturer’s instructions for safe operation and maintenance, as outlined in the FD150 user manual. Adhering to these guidelines will help ensure the safe and reliable operation of your FD150 terminal.

nys motorcycle permit manual pdf

New York State Motorcycle Permit Manual PDF⁚ A Comprehensive Guide

Embark on your journey to becoming a licensed motorcyclist in New York State with the essential NYS Motorcycle Permit Manual PDF. This comprehensive guide is your key to understanding safe riding practices, traffic laws, and everything you need to pass your permit test.

The New York State Motorcycle Manual serves as a vital resource for aspiring motorcyclists, offering a comprehensive overview of safe riding practices, traffic laws, and the necessary knowledge to obtain a motorcycle permit or license. This manual is meticulously crafted by the NYS Department of Motor Vehicles (DMV) to equip riders with the tools they need for safe and responsible motorcycle operation on New York roads. Whether you’re a beginner just starting your journey or an experienced driver seeking a motorcycle endorsement, this manual is an indispensable guide.

Within its pages, you’ll find detailed explanations of essential topics, including motorcycle controls, safe riding techniques, understanding road signs, and navigating various traffic situations. The manual emphasizes defensive driving strategies and the importance of wearing appropriate protective gear, such as helmets and durable clothing. Furthermore, it outlines the requirements for obtaining a motorcycle permit in NYS, including eligibility criteria, testing procedures, and restrictions on learner permits and junior licenses. By thoroughly studying this manual, you can significantly enhance your understanding of motorcycle safety and prepare effectively for the permit test, setting the foundation for a lifetime of safe and enjoyable riding.

Where to Find the Official NYS Motorcycle Manual PDF

Accessing the official NYS Motorcycle Manual in PDF format is a straightforward process, ensuring that aspiring riders have convenient access to essential information. The primary source for obtaining the manual is the New York State Department of Motor Vehicles (DMV) website. By visiting the DMV’s official website, you can easily locate and download the most up-to-date version of the motorcycle manual.

Typically, the manual is available in the “Driver’s Manuals” or “Motorcycle Safety” section of the website. The PDF format allows you to view the manual on various devices, including computers, tablets, and smartphones, making it accessible anytime, anywhere. It is crucial to ensure that you download the manual directly from the official DMV website to guarantee that you have the most accurate and current information. Be cautious of third-party websites or unofficial sources that may offer outdated or incomplete versions of the manual. By obtaining the PDF from the official source, you can be confident in your preparation for the motorcycle permit test and your understanding of New York’s motorcycle regulations.

Content Overview of the NYS Motorcycle Manual

The NYS Motorcycle Manual serves as a comprehensive guide, meticulously crafted to equip aspiring motorcyclists with the knowledge and skills necessary for safe and responsible riding. Its content spans a wide array of topics, beginning with an introduction to motorcycle operation and essential safety equipment. The manual delves into the intricacies of motorcycle control, covering fundamental techniques such as starting, stopping, turning, and maneuvering in various traffic conditions.

A significant portion of the manual is dedicated to traffic laws and regulations specific to motorcycles in New York State. It provides detailed explanations of road signs, signals, and pavement markings, ensuring riders can navigate roadways safely and confidently. Moreover, the manual emphasizes crucial defensive riding strategies, including hazard perception, risk management, and collision avoidance techniques. It also addresses the importance of rider fitness, covering topics such as fatigue, alcohol and drug impairment, and the impact of weather conditions on motorcycle operation. By thoroughly covering these key areas, the NYS Motorcycle Manual aims to foster a culture of safety and responsibility among motorcyclists.

Key Topics Covered in the Manual

The New York State Motorcycle Manual is a vital resource for anyone seeking to obtain a motorcycle permit or license in NYS. It meticulously covers a range of essential topics designed to ensure riders are well-prepared for the road. One key area is motorcycle safety equipment, detailing the importance of helmets, protective clothing, and other gear that can significantly reduce the risk of injury in the event of an accident.

The manual also delves into the rules of the road specific to motorcycles, including lane positioning, safe following distances, and strategies for navigating intersections. Understanding traffic laws and regulations is paramount, and the manual provides clear explanations of New York State’s traffic laws, road signs, and signals. Furthermore, the manual emphasizes defensive riding techniques, teaching riders how to anticipate hazards, react to changing road conditions, and avoid collisions. Safe riding practices are highlighted throughout, promoting responsible behavior and fostering a culture of safety among motorcyclists.

Preparing for the Motorcycle Permit Test

Success on the New York State motorcycle permit test hinges on thorough preparation. Your primary resource should be the official NYS Motorcycle Manual PDF, available for free on the Department of Motor Vehicles website. Begin by carefully reading the entire manual, paying close attention to key topics such as traffic laws, safe riding practices, and motorcycle-specific regulations. Take notes and highlight important information to reinforce your understanding.

After reading each section, test your knowledge by answering the review questions provided in the manual. Identify areas where you need further study and revisit those sections. Supplement your study with free online practice tests that simulate the actual permit test format. These practice tests provide valuable feedback on your strengths and weaknesses, allowing you to focus your efforts on areas where you need improvement. Don’t underestimate the importance of understanding road signs and traffic signals, as they are heavily featured on the permit test. Finally, get enough rest before the test.

Using Practice Tests for Effective Preparation

Practice tests are an invaluable tool when preparing for the New York State motorcycle permit test. They offer a realistic simulation of the actual exam, allowing you to familiarize yourself with the question format, time constraints, and content areas covered. By taking multiple practice tests, you can identify your strengths and weaknesses, enabling you to focus your study efforts on areas where you need improvement.

Numerous free online resources offer motorcycle permit practice tests tailored to the NYS DMV requirements. These tests often cover a wide range of topics, including traffic laws, safe riding techniques, and road signs. As you take each practice test, carefully review the answers and explanations provided. Pay attention to the rationale behind correct answers and learn from your mistakes. Track your progress over time to gauge your improvement and identify any persistent knowledge gaps. Aim to consistently score well on practice tests before attempting the official permit test. By using practice tests strategically, you can build confidence and increase your chances of success.

Importance of Understanding Road Signs and Traffic Laws

A thorough understanding of road signs and traffic laws is paramount for any motorcyclist, but especially crucial for those seeking a motorcycle permit in New York State. Road signs provide vital information about upcoming road conditions, potential hazards, and regulatory requirements. Recognizing and interpreting these signs quickly and accurately can help you make informed decisions while riding, ensuring your safety and the safety of others.

Traffic laws govern how vehicles operate on the road, establishing rules of the road, right-of-way procedures, and speed limits. Familiarizing yourself with these laws is essential for responsible and legal motorcycle operation. The NYS Motorcycle Permit Manual PDF dedicates significant attention to road signs and traffic laws, providing detailed explanations and examples. Study these sections carefully, paying close attention to the meanings of different signs and the specific regulations that apply to motorcyclists. Remember that ignorance of the law is not an excuse, and a solid grasp of these concepts is critical for passing your permit test and becoming a safe and responsible rider on New York’s roadways.

Safe Riding Practices Emphasized in the Manual

The NYS Motorcycle Permit Manual PDF places a strong emphasis on safe riding practices, recognizing that motorcycles offer less protection than other vehicles. The manual stresses the importance of wearing appropriate protective gear, including a DOT-approved helmet, eye protection, gloves, sturdy boots, and protective clothing. These items can significantly reduce the risk of injury in the event of an accident.

The manual also covers essential riding techniques, such as proper posture, braking, and turning. It emphasizes the importance of maintaining a safe following distance, being aware of your surroundings, and anticipating potential hazards. Defensive riding strategies, such as scanning for other vehicles and being visible to other drivers, are also highlighted. Furthermore, the manual addresses the dangers of riding under the influence of alcohol or drugs and encourages riders to avoid distractions while operating a motorcycle. By adhering to the safe riding practices outlined in the NYS Motorcycle Permit Manual PDF, you can significantly reduce your risk of accidents and ensure a safer riding experience. Remember, safety is always the top priority when operating a motorcycle.

Requirements for Obtaining a Motorcycle Permit in NYS

To obtain a motorcycle permit in New York State, aspiring riders must meet specific requirements outlined in the NYS Motorcycle Permit Manual PDF. The first step involves being at least 16 years of age. Applicants must then pass a vision test and a written knowledge test based on the information contained within the motorcycle manual and potentially the driver’s manual.

Proof of identification, such as a valid New York State Driver’s License, NYS MC Permit, or NYS Non-Driver ID card (all with photo), is also required. Additionally, applicants must complete form MV-21MC and pay the applicable fees. It is essential to study the NYS Motorcycle Permit Manual PDF thoroughly to prepare for the written test, as it covers a wide range of topics, including traffic laws, safe riding practices, and motorcycle-specific regulations. Successfully meeting these requirements allows individuals to obtain a motorcycle permit and begin practicing their riding skills under supervision.

Restrictions on Learner Permits and Junior Licenses

In New York State, learner permits and junior licenses for motorcycles come with specific restrictions designed to ensure the safety of new riders and the public. According to the NYS Motorcycle Permit Manual PDF, holders of learner permits and junior licenses (Class M or MJ) are subject to certain limitations regarding when and where they can operate a motorcycle.

These restrictions often include prohibitions on riding at night, carrying passengers, and operating a motorcycle on certain high-speed roadways or in specific areas. The purpose of these limitations is to provide a controlled environment for new riders to gain experience and develop their skills before being granted full riding privileges. It is crucial for permit and junior license holders to familiarize themselves with and adhere to these restrictions, as violations can result in penalties, including suspension or revocation of their permit or license. The NYS Motorcycle Permit Manual PDF clearly outlines all restrictions.

Additional Resources for Motorcycle Safety in New York

Beyond the essential NYS Motorcycle Permit Manual PDF, numerous additional resources are available in New York to enhance motorcycle safety and rider education. The New York State Motorcycle Safety Program offers various courses and training programs designed to improve riding skills, promote safe practices, and reduce motorcycle accidents. These programs cater to riders of all experience levels, from beginners to advanced motorcyclists.

The New York DMV website is a valuable source of information, providing access to online forms, publications, and videos related to motorcycle safety. Additionally, several motorcycle organizations and clubs throughout the state offer educational resources, group rides, and advocacy for rider safety. Exploring these resources can significantly contribute to a rider’s knowledge, skills, and overall safety on the road. By taking advantage of these opportunities, motorcyclists in New York can become more informed, skilled, and responsible riders.